Overview
You can manage multiple maps inside a single project. You will be presented with the overview screen when opening the app for the first time or if the project does not contain any story maps.
You will find a list of all available story maps here, and you can create a new one.
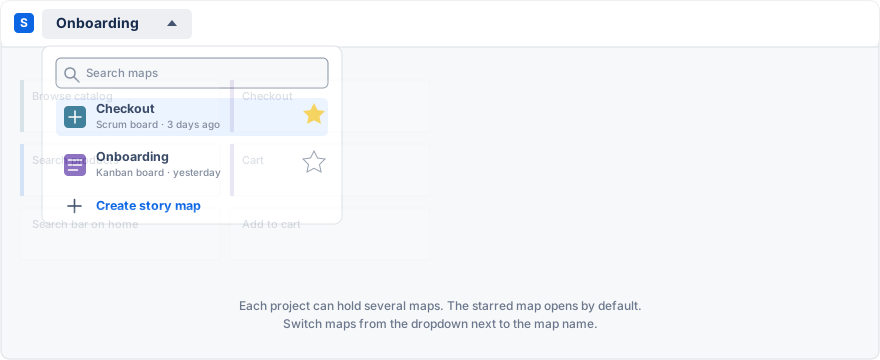
For each story map, you will have the following options:
View
Jump right into your story map.
Open by default
You can skip the overview screen in the future if you want to primarily work with one story map. When clicking the star icon, the app will save this configuration for you, the individual user, not the entire project. Next time, your primary story map will load when opening the app.
Rename
Rename the story map anytime to keep organized.
Remove
Will remove the story map alongside all the configurations. The issues inside the story map will not be affected.
Adding a new story map
Read the Advanced Story Maps setup guide.
The story map screen
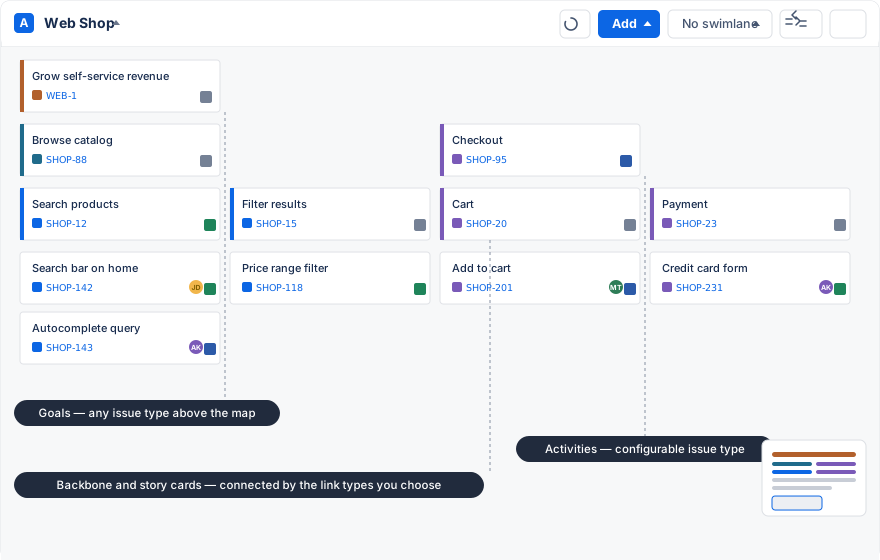
- Reload re-reads activities, epics and issues from Jira.
- Add creates issues at any level of the hierarchy, or sprints and releases in swimlane views.
- The view switcher changes between no swimlanes, TreeView, sprints, releases, and custom swimlanes.
- Dependencies overlays issue-link lines between the cards.
- Goals opens the goals panel where that feature is configured.
- Settings opens the map configuration: general, view, hierarchy, fields, and advanced.
- The goal row sits above the activities when the map uses a top-level hierarchy.
- The backbone determines the columns of the story map.
- The minimap in the lower-right corner helps you navigate large maps.