Getting Started
Story Maps for Jira runs inside Jira Software projects. To use it, the app needs to be installed on your Jira site and you need permission to browse and edit issues in the project.
Open the app
- Open the Jira project whose backlog you want to map.
- Select Story Maps in the project navigation on the left.
Create a map
The first time you open the app, it walks you through a short setup:
- Pick a board. The map is based on one agile board. Search for the board that contains the backlog you want to plan. A scrum board gives you sprint lanes; a kanban board limits you to release lanes.
- Confirm the backbone issue type. The app suggests your project’s epic type for the backbone. Confirm the suggestion or pick a different issue type.
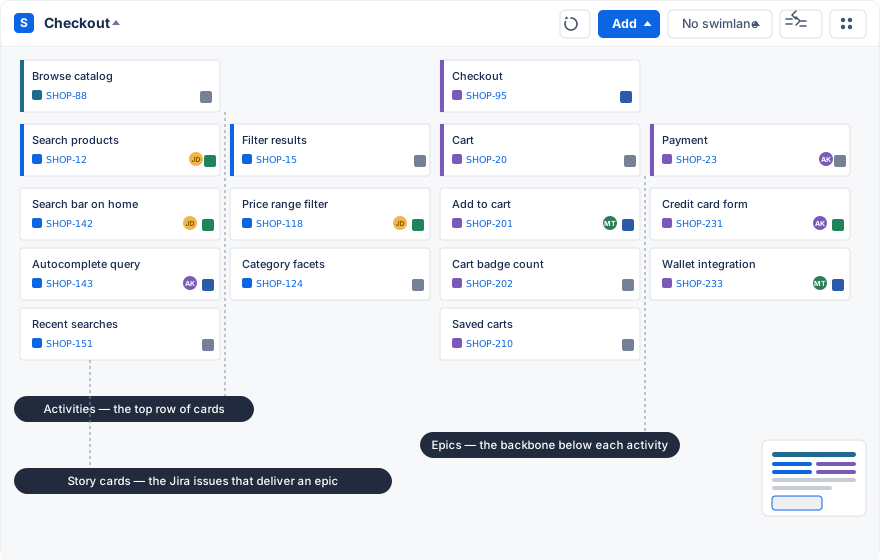
That’s it. The app loads the board’s issues onto the map, grouped by the epics they belong to.
A second map, if you need one
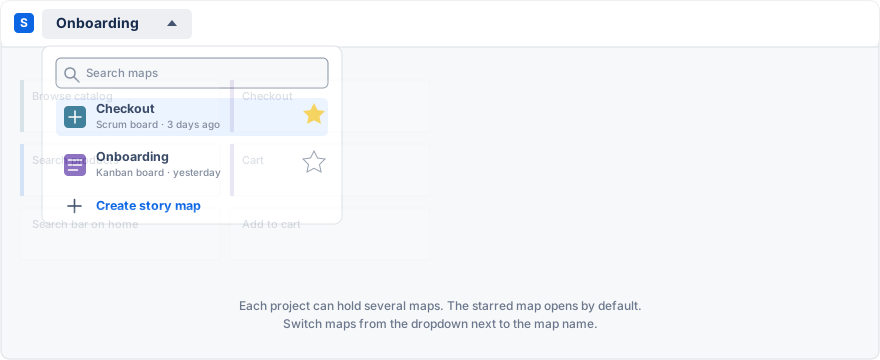
A project can hold any number of maps, for example one per team or one per product area — Story Maps for Jira provides multiple story maps in each project. Open the dropdown next to the map name and choose Create story map. Each map has its own board, hierarchy, and settings. The map marked with a star opens by default; hover over a map in the list to move the star.
Build the first slice
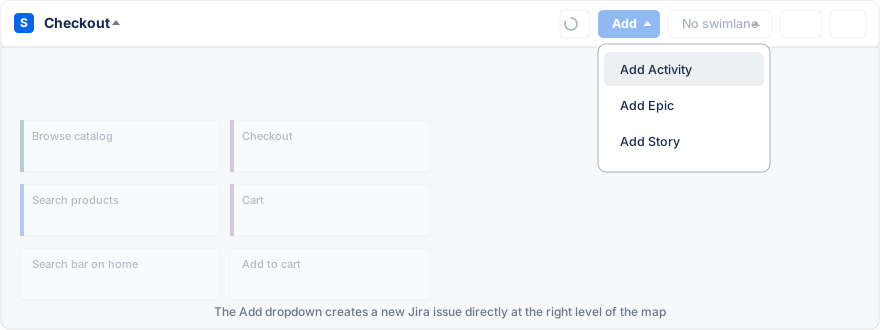
Start with a small part of the journey rather than the whole backlog. Use the Add button to create issues at the level you need: an activity for a big user step, an epic for a product capability, a story for the detail. You can also use Add to find an existing issue and place it on the map.
Arrange the activities from left to right in the order a user meets them. Within each column, put the most important work at the top. A first map is useful as soon as it can carry a planning conversation; it does not need to be complete.
Plan delivery
Switch the view from No swimlane to Sprints or Releases. Drag issues between lanes to assign them. The app writes the sprint or fix version back to the Jira issue, so your board stays in sync.
Continue with Working With the Map, or see Common Issues & Questions if a control you expect is missing.