Using the app
Basics
A user story map consists of 3 layers, the activity layer, the backbone, and the user stories. All these have different names depending on whom you ask - often, the activities are referred to as "goals" - the backbone as user steps or epics in the Jira context, and user stories as details.
In this document, we will refer to the layers in the following way.

The activities layer is optional; see working with top-level elements for details.
Organizing user stories
Using drag and drop, steps can be rearranged from left to right or from right to left. You can reorder them horizontally without changing the issues associated with these epics. Jira issues in the user stories layer can also be reordered or associated with another step via drag and drop anywhere on the map.
Dragging issues between the different layers is not supported and discouraged - you can not add an issue from the user stories layer to the steps layer - please use distinct issue types for clarity.
You can add colors to each step to visually separate them. If you want to, you can also go to Settings -> Display and enable all issues in the column to inherit this color, helping to separate them visually.
Assigning issues to sprints, releases
If you want to plan sprints or releases, you can select the "Swimlanes" dropdown in the top left corner.
When switching the story map to either of these modes, you will see existing sprints or releases from the underlying agile board.
When dragging an issue from either the unassigned swimlane or another sprint/release swimlane, the app will associate the issue in the background with this sprint or release. The change happens instantly in the UI, so you can quickly rearrange many issues at once.

If you do not see either the sprint or release options, the board associated to your story map, may not support this feature. See troubleshooting for details.
Custom swimlanes
Sometimes, managing story maps with sprints or releases is not enough. Custom swimlanes help you plan more long-term or deal with "fuzziness" - for example if you don't exactly know when a change can occur.
Custom swimlanes work with free form text, so you call them "Iteration 1" or "Iteration 2". Or you could use "Near term" or "Medium-term" and create a more rough outline of your product roadmap.
Custom field swimlanes
For organizations that organize their Jira-wide releases in custom fields - you can select the swimlanes to display values of single-select custom fields via the settings. Go to swimlanes and add the desired custom field. You can then assign issues to these values via the respective swimlane view.
Read the full guide on how to do this here.
Estimation
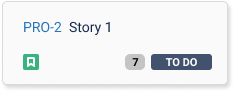
If the selected agile board supports estimation with story points, you will see little bubbles with the story point estimate appearing on the cards. You can click them to change the estimates on the fly. If the swimlanes display story point statistics (see settings) the story map will reflect these changes in the story point totals shown for each sprint/release or custom swimlane.
Goals / Activities
Story Mapping app supports a level above the backbone/step row representing user activities or high-level goals in a story map. Read more on this in our dedicated guide on Top Level Elements.
Filters / Quick Filters
If you have an agile board associated with the story map, you can find all quick filters from this board when clicking the filter symbol next to the swimlane drop down in the top right-hand corner. You can activate these filters by clicking them. You can also add custom filters by using the filter manager, which you can open when clicking the "Manage Filters" button. Filtering will limit the issues that will be visible but will not affect the "step/backbone" row. We suggest adding different static story maps when you want to have a different backbone in the story map.